Understanding the Work Orders Page
This section is where users create and track the progress of a chassis' work order. Once a work order is submitted, it is reviewed and either approved, denied, or sent back for changes. A bill is created once a work order is finalized.
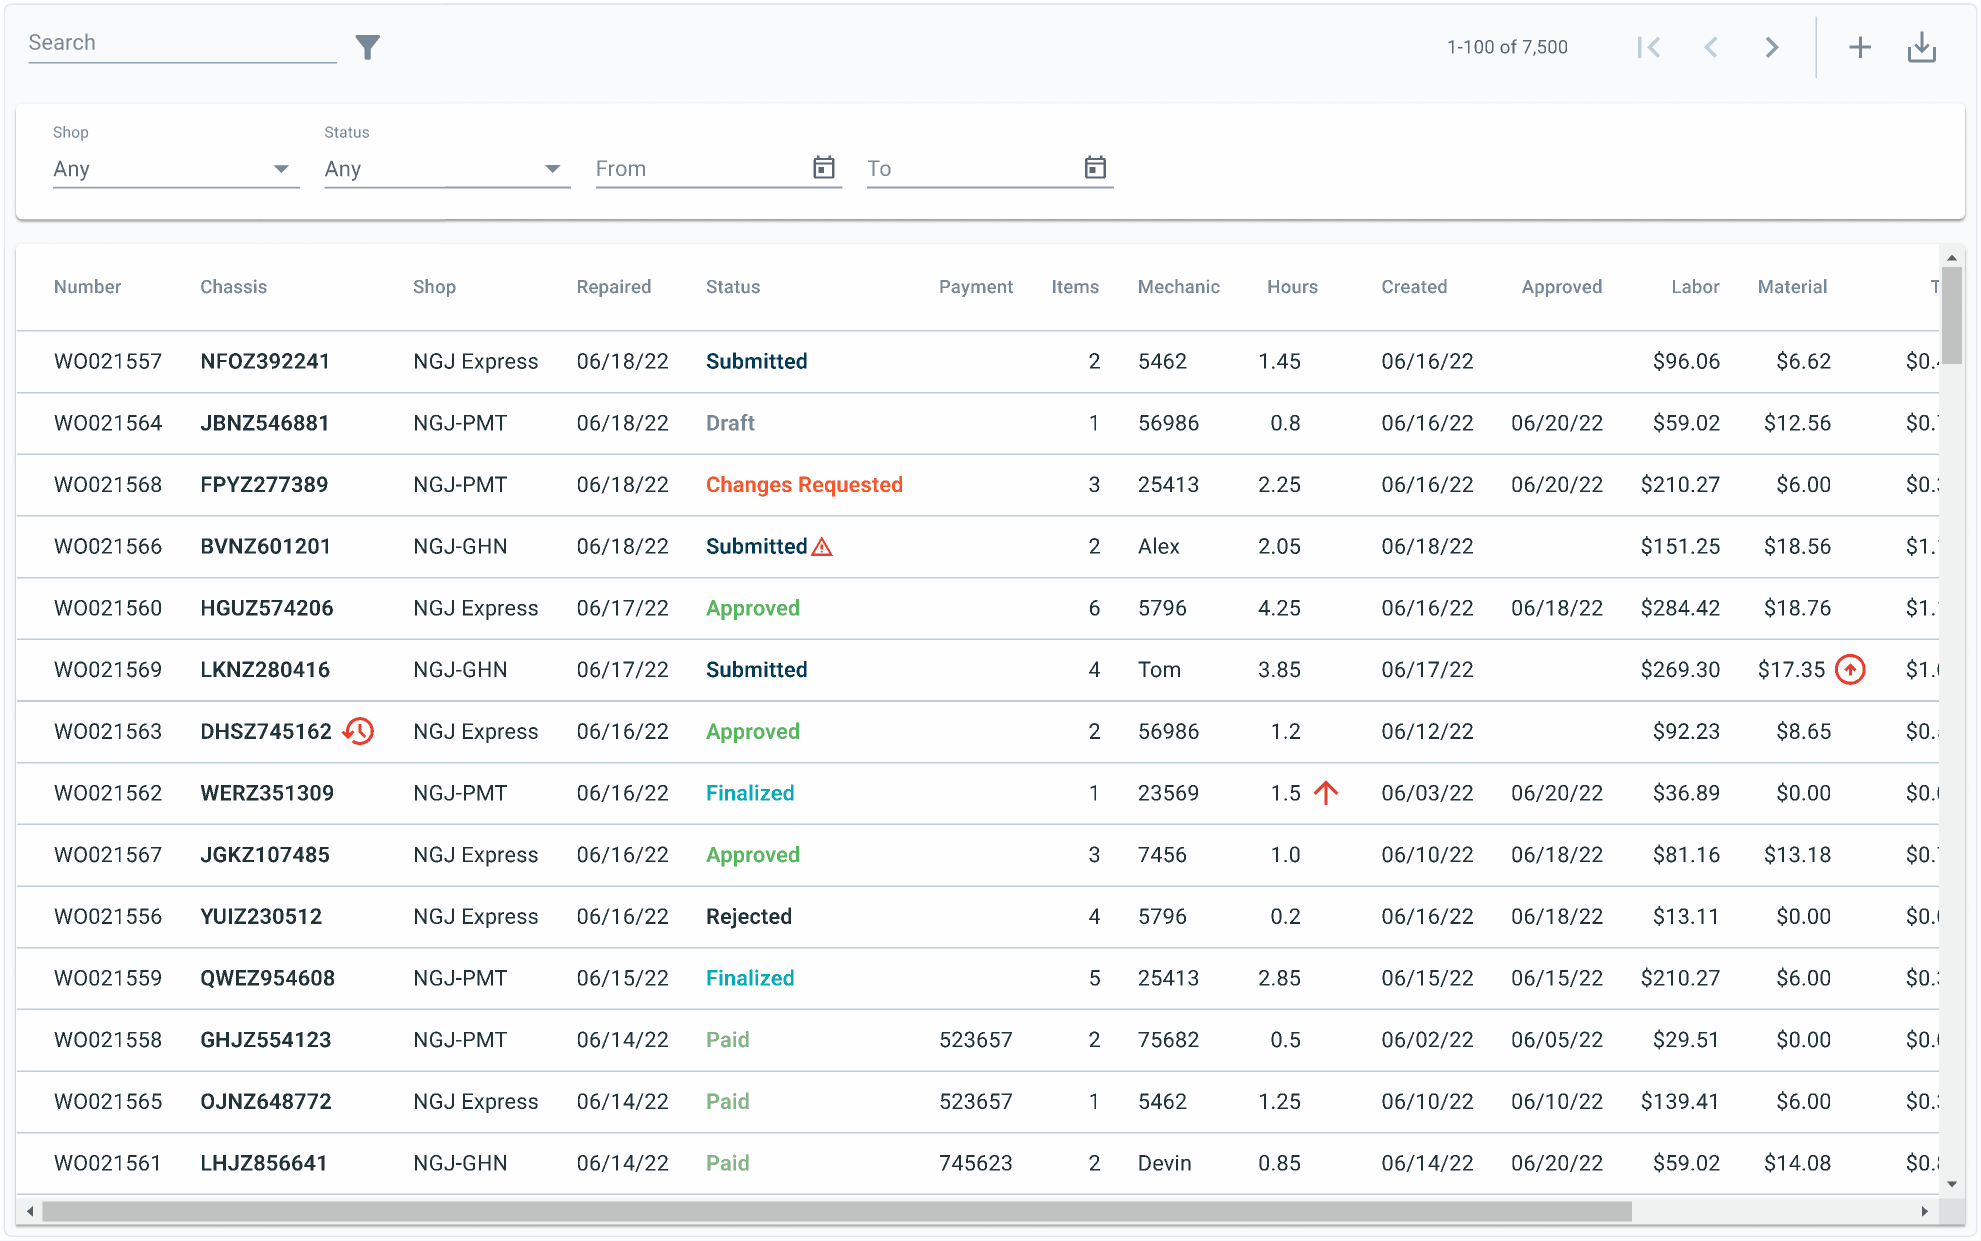
Work Order Table
| Column | Description |
|---|---|
| Number | Unique number to identify each work order. |
| Chassis | The chassis related to the work order. |
| Shop | The shop that did the repairs. |
| Repaired | The date the repairs were completed on. |
| Status | Draft- work order being input and not yet ready for review. Submitted- work order is ready for review. Approved- work order has been approved for payment. Change Requested- changes have been requested prior to approval. Finalized- work order can no longer be altered and is ready to be paid. Paid- vendor has been paid for work. Rejected- entire work order has been rejected. |
| Payment | The payment id to match with bank account. |
| Items | The number of items on the chassis that need to be repaired. |
| Mechanic | The name or identification number of the mechanic handling the work order. |
| Hours | The amount of time it took to complete the entire work order. |
| Created | The date the work order was created. |
| Approved | The date the work order was approved. |
| Labor | The total cost of the labor for the work order. |
| Material | The cost of all the materials needed for the work order. |
| Tax | The tax cost for the work order. |
| Total | The full price of the work order, including labor, materials, and tax. |
| Site | The repair location. |
| Reference # | The number connecting a work order with shop details. |
| Voucher | The identification number for the repair's bill.
|
Filtering the Work Order Table
Users can reduce the content to show only what is needed at the time by using the filter options. There are five different ways to filter the table.
| Types | How to use | How to remove |
|---|---|---|
| Allows users to look up specific items such as a work order number, chassis, payment, mechanic, reference #, and voucher. | Select the X to the right of the filter. | |
 | Filters based on what shop is performing the repairs.
| click on the option again to remove. |
 | Filters based on the status of the order.
| click on the option again to remove. |
 | Shows any order that has taken place before or on selected date. There are two ways to enter a date:
| Select the date and erase. |
 | Shows any order that has taken place on selected date or after. There are two ways to enter a date:
| Select the date and erase. |
To remove all options inside one multi-select filter, select the ![]() button at the top left corner of each filter.
button at the top left corner of each filter.

To remove all filters at one time select Clear located on the right side of the filters section.

Hide Filters
If you want to hide the filter section, select the ![]() icon at the top left of the screen next to the search section.
icon at the top left of the screen next to the search section.
To learn how to navigate the data table click here.